Introduction
You keep hearing the hype. What is lens? Lens is a decentralized social graph. You can think of it sort of like a decentralized API that holds all of your social content. Imagine if you could have a single point of reference for all the content on your social media accounts? How awesome would that be? Helllllo 😎 Lens. The more we build on Lens, the stronger the network.
For an explanation on the different modules & publications 👇🏽
Lens is complex, but the complexity is exactly why this project has so much potential. Choose your own adventure 🌈
GARD3N
For ETH.NYC, my team blu3 DAO, decided to build Gard3n. Gard3n is a public good, social platform built on lens, that creates a new way for creators and their fans to blossom together using social tokens. Simple tokenomics with easy to use templates, user friendly UI experience and multimedia creation all in one place.
With only 38 hours to build, I dove into the Lens portion of the app. I am going to walk you through three Lens queries with a basic UI. This app is a work in progress, it will grow and mature as I learn 🌱
Clone the Project
This project was created with React, NextJS, and Tailwind. For the sake of your time (and mine, lolol), I have added most of the style sheets already so that all you need to focus on learning is over Lens. Here is to pt.1... 🚀
Github: Starter Code
Github: Final Code
Lens
Recommended Profiles
Open the project with your favorite code editor. In root /, create a new file and name it api.js.
Add the following code:
// urql is a graphql client
import { createClient } from 'urql'

// we are calling the mainnet contract - more on this later
const API_URL = "https://api.lens.dev"

// creating an instance of this new client
export const client = createClient({
   url: API_URL
})
Copy the RecommendedProfiles Query. Go back into api.js and add the following const
export const getRecommendedProfiles = `
query RecommendedProfiles {
    recommendedProfiles {
          id
        name
        bio
        // ...
  }
`
Go to /components/Profiles. This is where we are going to call that query we just created. First let's just log out the response.
Add these imports (do no remove the existing imports, just add to them)
import { useEffect, useState } from 'react'
import { client, getRecommendedProfiles } from '../api'
Add a useEffect hook and create a new function called fetchRecommendedProfiles inside of Profile
// we want to called fetchRecommendedProfiles on every load
useEffect(() => {
    fetchRecommendedProfiles()
  }, [])

  async function fetchRecommendedProfiles(){
    try {
      const response = await client.query(getRecommendedProfiles).toPromise()
      console.log(response)
    } catch(e){
      console.log(e)
    }
  }
Start your server. Navigate to localhost:3000/profiles
Make sure you are at at
/profiles, not/
Sick, you should see the logged response in your console.
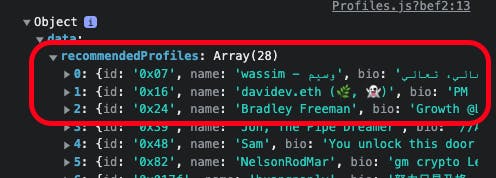
Now we are going to save that response in a variable called profiles:
const [ profiles, setProfiles ] = useState()
Right after response is declared, you are going to set profiles with the new response like this:
setProfiles(response.data.recommendedProfiles)
Sanity check. This is how Profile.js should look like:
import Navigation from './Navigation'
import { useEffect } from 'react'
import { client, getRecommendedProfiles } from '../api'

export default function Profiles() {
  const [profiles, setProfiles] = useState()

  useEffect(() => {
    fetchRecommendedProfiles()
  }, [])

  async function fetchRecommendedProfiles() {
    try {
      const response = await client.query(getRecommendedProfiles).toPromise()
      setProfiles(response.data.recommendedProfiles)
    } catch (e) {
      console.log(e)
    }
  }

  return (
    <div className='flex w-screen h-screen'>
      <Navigation />
      <div className='overflow-scroll sm:w-2/3'>
      </div>
    </div>
  )
}
CODE DROP: Updating Profiles.js to map through through the recommended profiles. Each profile will be on it's own card with it's own data details.
import { useEffect, useState } from 'react'
import Navigation from './Navigation'
import { client, getRecommendedProfiles } from '../api'
// because I use tailwind, my classes can get pretty bulky.
// I like to create a variable for the styles and import them
// to keep my code clean.
// You can do whatever you prefer
import { ProfileItemStyle, ImageStyle } from '../components/Profiles.styles'
// importing Link so you can click on the cards
import Link from 'next/link'

export default function Profiles() {
  const [profiles, setProfiles] = useState()
// new const variable
  const CONSTANT_BIO = 'Ut enim ad minim veniam, quis nostrud exercitation ullamco laboris nisi ut aliquip ex ea commodo consequat'
  useEffect(() => {
    fetchRecommendedProfiles()
  }, [])

  async function fetchRecommendedProfiles() {
    try {
      const response = await client.query(getRecommendedProfiles).toPromise()
      setProfiles(response.data.recommendedProfiles)
    } catch (e) {
      console.log(e)
    }
  }

// this prevents us from getting an undefined error if profiles is still empty
  if (!profiles) return null

  return (
    <div className='flex w-screen h-screen'>
      <Navigation />
      <div className='overflow-scroll sm:w-2/3'>
<!-- map through the profiles you set in setProfiles -->
        {
          profiles.map((profile, i) => (
<!-- adds a custom link for each profile card -->
            <Link key={i} href={`/profile/${profile.id}`}>
              <div className={ProfileItemStyle}>
                <div className='flex items-center'>
<!-- include the image if it exist, if not use a gray bg -->
                  {
                    profile.picture ? (
                      // eslint-disable-next-line @next/next/no-img-element
                      <img
                        src={profile.picture?.original?.url || profile.picture.uri}
                        alt={profile.handle}
                        className={ImageStyle}
                      />
                    ) : (
                      <div className={ImageStyle + `bg-gray-500`}>
                      </div>
                    )
                  }
                  <h4>{profile.handle}</h4>
                </div>
<!-- include the profile bio if it exist, if not use CONSTANT_BIO -->
                <p className='text-xs'>{profile.bio ? profile.bio : CONSTANT_BIO}</p>
              </div>
            </Link>
          ))
        }
      </div>
    </div>
  )
}
You should see something like this
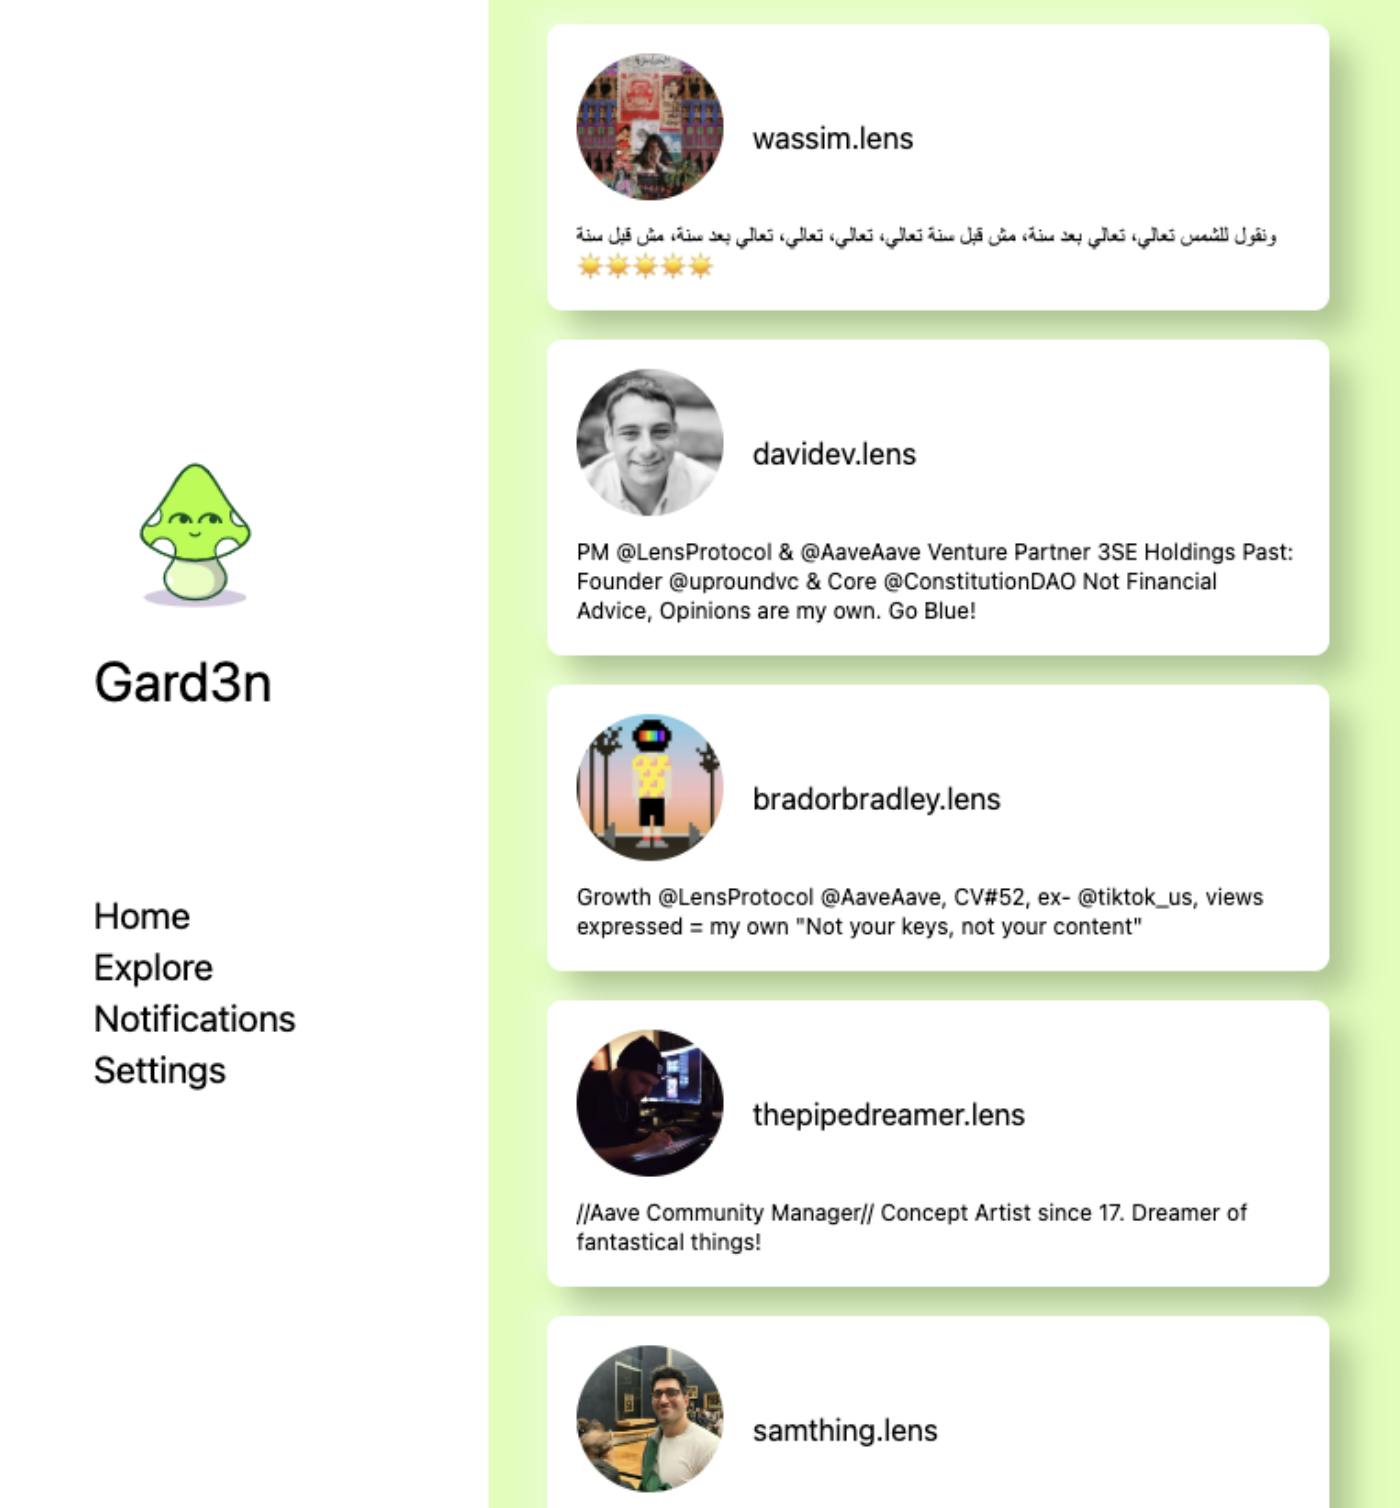
Review. We queried RecommendedProfiles and rendered the profiles on cards with their own profile data. We also added a Link to those cards to direct us to the page => /profile/{id}. Next, we will build [id].
Profile
Go to api.js and add the following query from Profile
export const getProfile = `
query Profile {
  profile(request: { profileId: "0x01" }) {
    id
    name
    bio
// ...
}
`
Since we are going to pass in an id we need to add a parameter to this query. Change getProfile to look like this
export const getProfile = `
query Profile ( $id: ProfileId! ) {
  profile(request: { profileId: $id }) {
    id
    name
    bio
// ...
}
`
Open [id].js and add these imports
import { useEffect, useState } from 'react'
import { client, getProfile } from '../../api'
Add this to SelectedProfile
  useEffect(() => {
    fetchProfile()
  }, [])

  async function fetchProfile(){
    let id = '0xf5'
    const response = await client.query(getProfile, {id}).toPromise()
    console.log(response)
  }
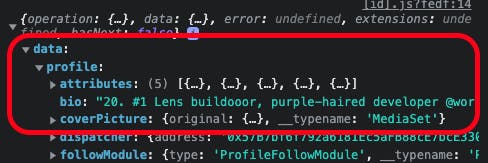
Visit http://localhost:3000/profile/0xf5 and check your console
CODE DUMP: We are going to add the styled cards and parse through the profile data in [id].js.
/* eslint-disable @next/next/no-img-element */
import { useRouter } from 'next/router'
import { useState, useEffect } from 'react'
import { client, getProfile } from '../../api'
import Navigation from '../../components/Navigation'
// nothing new, just importing styles
import { ProfileDetailStyle, ImageStyle } from '../../components/[id].styles'

export default function SelectedProfile() {
// this will be the current state of the selected profile details
  const [profile, setProfile] = useState()

// router used to query the id from `Profiles`
  const router = useRouter()
  const { id } = router.query

// anytime the id changes, fetchProfile will re-run
  useEffect(() => {
    if (id) {
      fetchProfile()
    }
  }, [id])


  async function fetchProfile() {
// throw this in a try/catch block
    try {
// changed the response name to profileResponse
      const profileRepsonse = await client.query(getProfile, { id }).toPromise()
      const profileData = profileRepsonse.data.profile
// setting profile data
      setProfile(profileData)
    } catch (e) {
      console.log('error fetching profile...', e)
    }
  }

// same reason as before, if we don't have a profile loaded, we don't want to run anything
  if (!profile) return null

  return (
    <div className='flex w-screen h-screen'>
      <Navigation />
      <div className='overflow-scroll sm:w-2/3'>
<!-- NEW CODE - copy below this comment -->
        <div className={ProfileDetailStyle}>
          <div className='flex items-center'>
<!-- if the profile picture exists, then the avatar is loaded -->
<!-- if not the gray bg is loaded -->
            {
              profile.picture ? (
                // eslint-disable-next-line @next/next/no-img-element
                <img
                  src={profile.picture?.original?.url || profile.picture.uri}
                  alt={profile.handle}
                  className={ImageStyle}
                />
              ) : (
                <div className={ImageStyle + `bg-gray-500`}>
                </div>
              )
            }
<!-- we slice profile.handle to remove '.lens' -->
            <h4 className='text-lg'>{profile.name} | @{profile.handle.slice(0, -5)}</h4>
          </div>
          <p>{profile.bio}</p>
          <div className='flex items-center place-content-between mt-2'>
            <span>Followers: {profile.stats.totalFollowers} | Following: {profile.stats.totalFollowing}</span>
          </div>
        </div>
<!-- Copy above this comment -->
      </div>
    </div>
  )
}
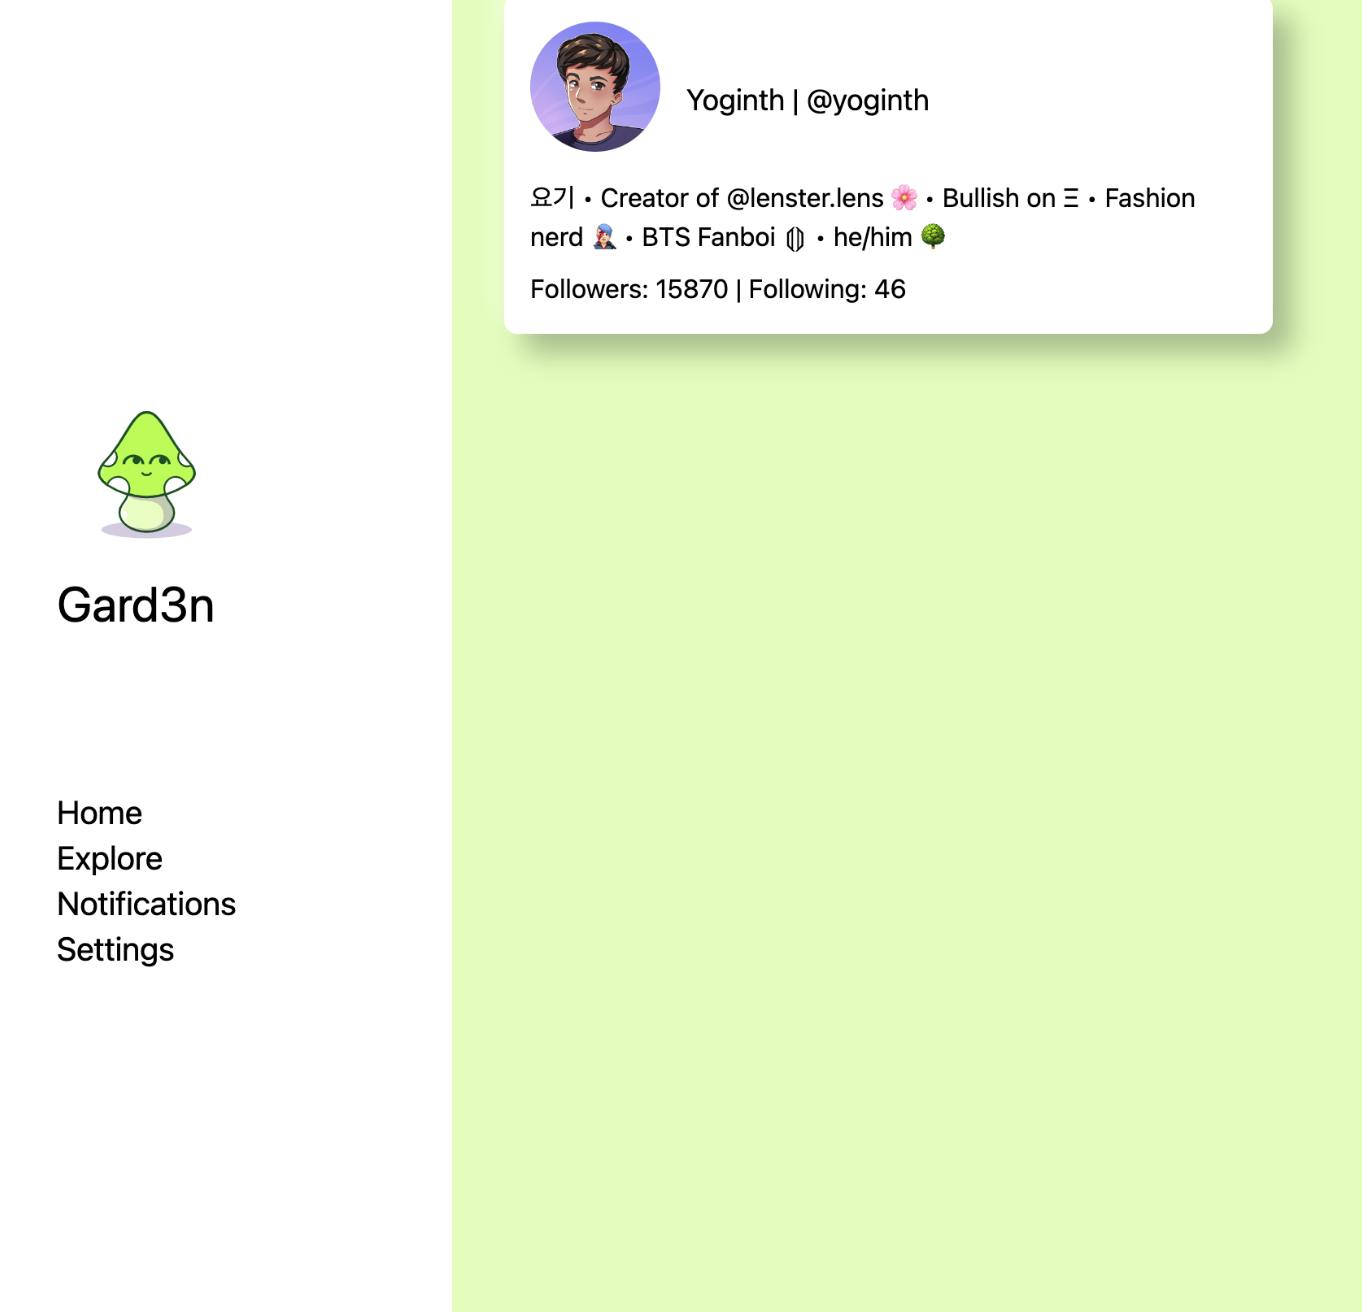
Nice job. Let's review what we have just done. We queried Profile from api.js, fetched the profile with the id that we passed in, and linked the card to the selected profile id.
Almost done. Next we are going to get the publications.
Publications
Copy the Publications query and create a new variable named getPublications in api.js.
export const getPublications = `
query Publications {
  publications(request: {
    profileId: "0x01",
    publicationTypes: [POST, COMMENT, MIRROR],
    limit: 10
// ...
}
`
Update getPublications to this:
export const getPublications = `
query Publications ($id:ProfileId!) {
  publications(request: {
    profileId: $id,
    publicationTypes: [POST],
    limit: 20
// ...
}
`
Go back to [id].js and import getPublications
import { client, getProfile, getPublications } from '../../api'
Update fetchProfile
  async function fetchProfile() {
    try {
      const profileRepsonse = await client.query(getProfile, { id }).toPromise()
// adding the publications response
      const publicationsReponse = await client.query(getPublications, { id }).toPromise()
// expect to see an array of publication. note: some users may have 0
      console.log('publications', publicationsReponse.data.publications.items)
      const profileData = profileRepsonse.data.profile
      setProfile(profileData)
    } catch (e) {
      console.log('error fetching profile...', e)
    }
  }
While running your server, look at the console in http://localhost:3000/profile/0x0d. You should see an array of publications.
Let's create a variable to hold the new publications state and a place to set it. Add this under profile and setProfile
const [ publications, setPublications ] = useState()
Update your styles import:
import { ProfileDetailStyle, ImageStyle, ProfilePublicationStyle } from '../../components/[id].styles'
Update fetchProfile:
  async function fetchProfile() {
    try {
      const profileRepsonse = await client.query(getProfile, { id }).toPromise()
      const publicationsReponse = await client.query(getPublications, { id }).toPromise()
      const profileData = profileRepsonse.data.profile
// save the array of the publications into this variable
      const publicationsData = publicationsReponse.data.publications.items
      setProfile(profileData)
// set the publications data to `publications`
      setPublications(publicationsData)
    } catch (e) {
      console.log('error fetching profile...', e)
    }
  }
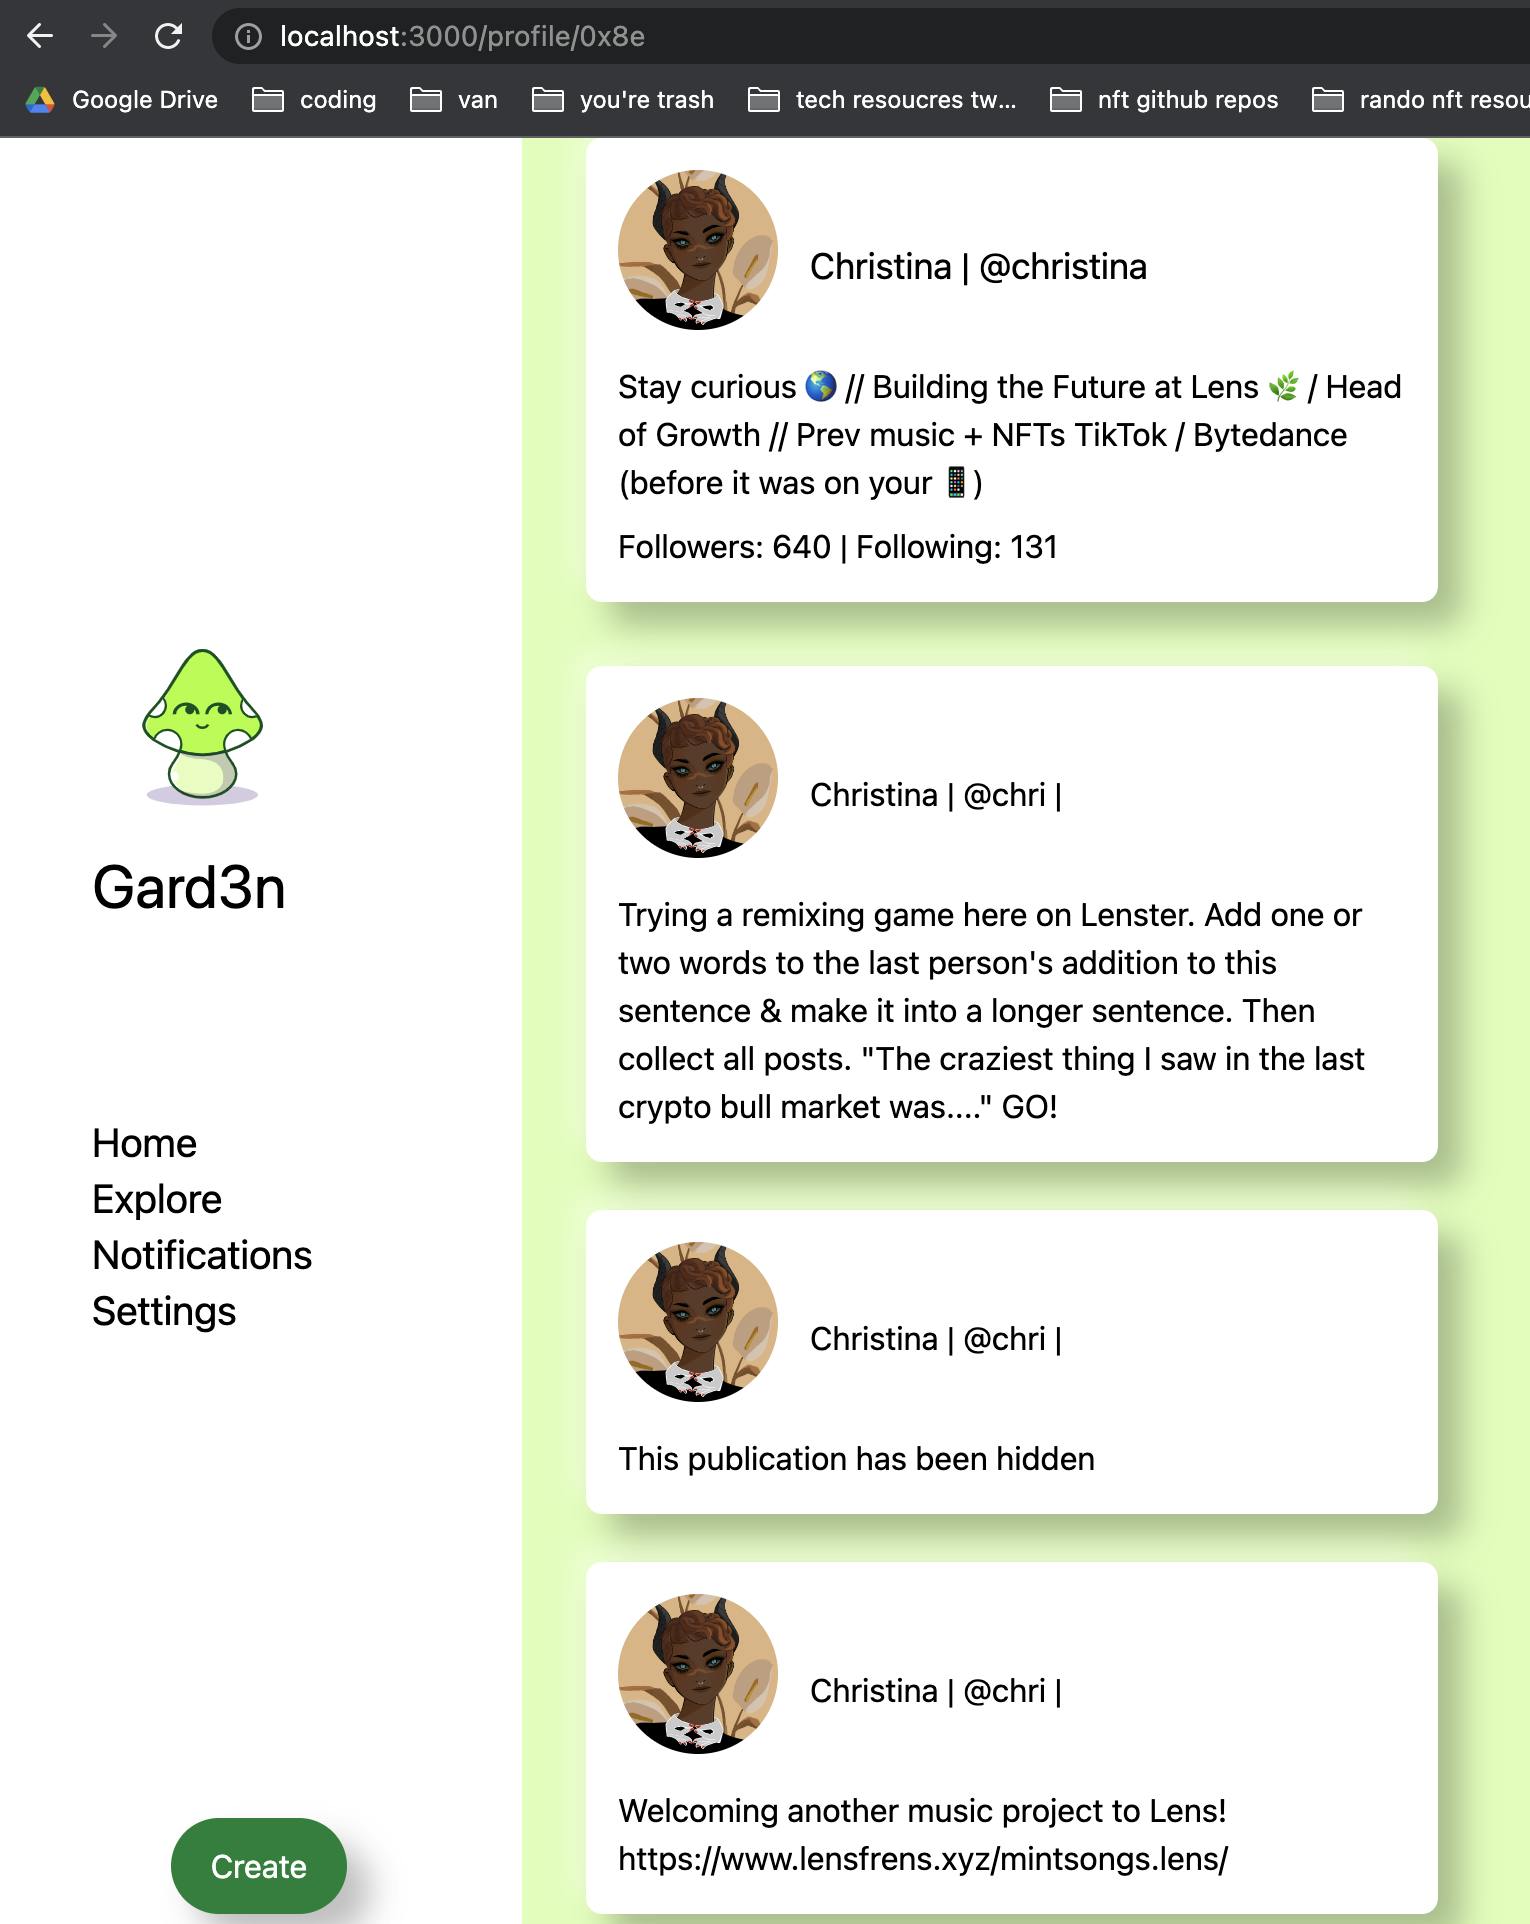
Next up we're gonna add the styled cards and logic for the Publications. Let's break it down. After the ProfileDetailStyle div, add this block:
<! -- map through the publications -->
        {
          publications?.map((pub, i) => (
            <div key={i} className={ProfilePublicationStyle}>
              <div className='flex items-center'>
                <img
                  src={profile.picture?.original?.url || profile.picture.uri}
                  alt={profile.handle.slice(0, -4)}
                  className={ImageStyle}
                />
                <span>{profile.name} | @{profile.handle.slice(0, 4)} | </span>
              </div>
              <p>{pub.metadata.content}</p>
            </div>
          ))
        }
Nicee. You should be able to see something like this. Change up the id in the url if you want to look at other profiles.
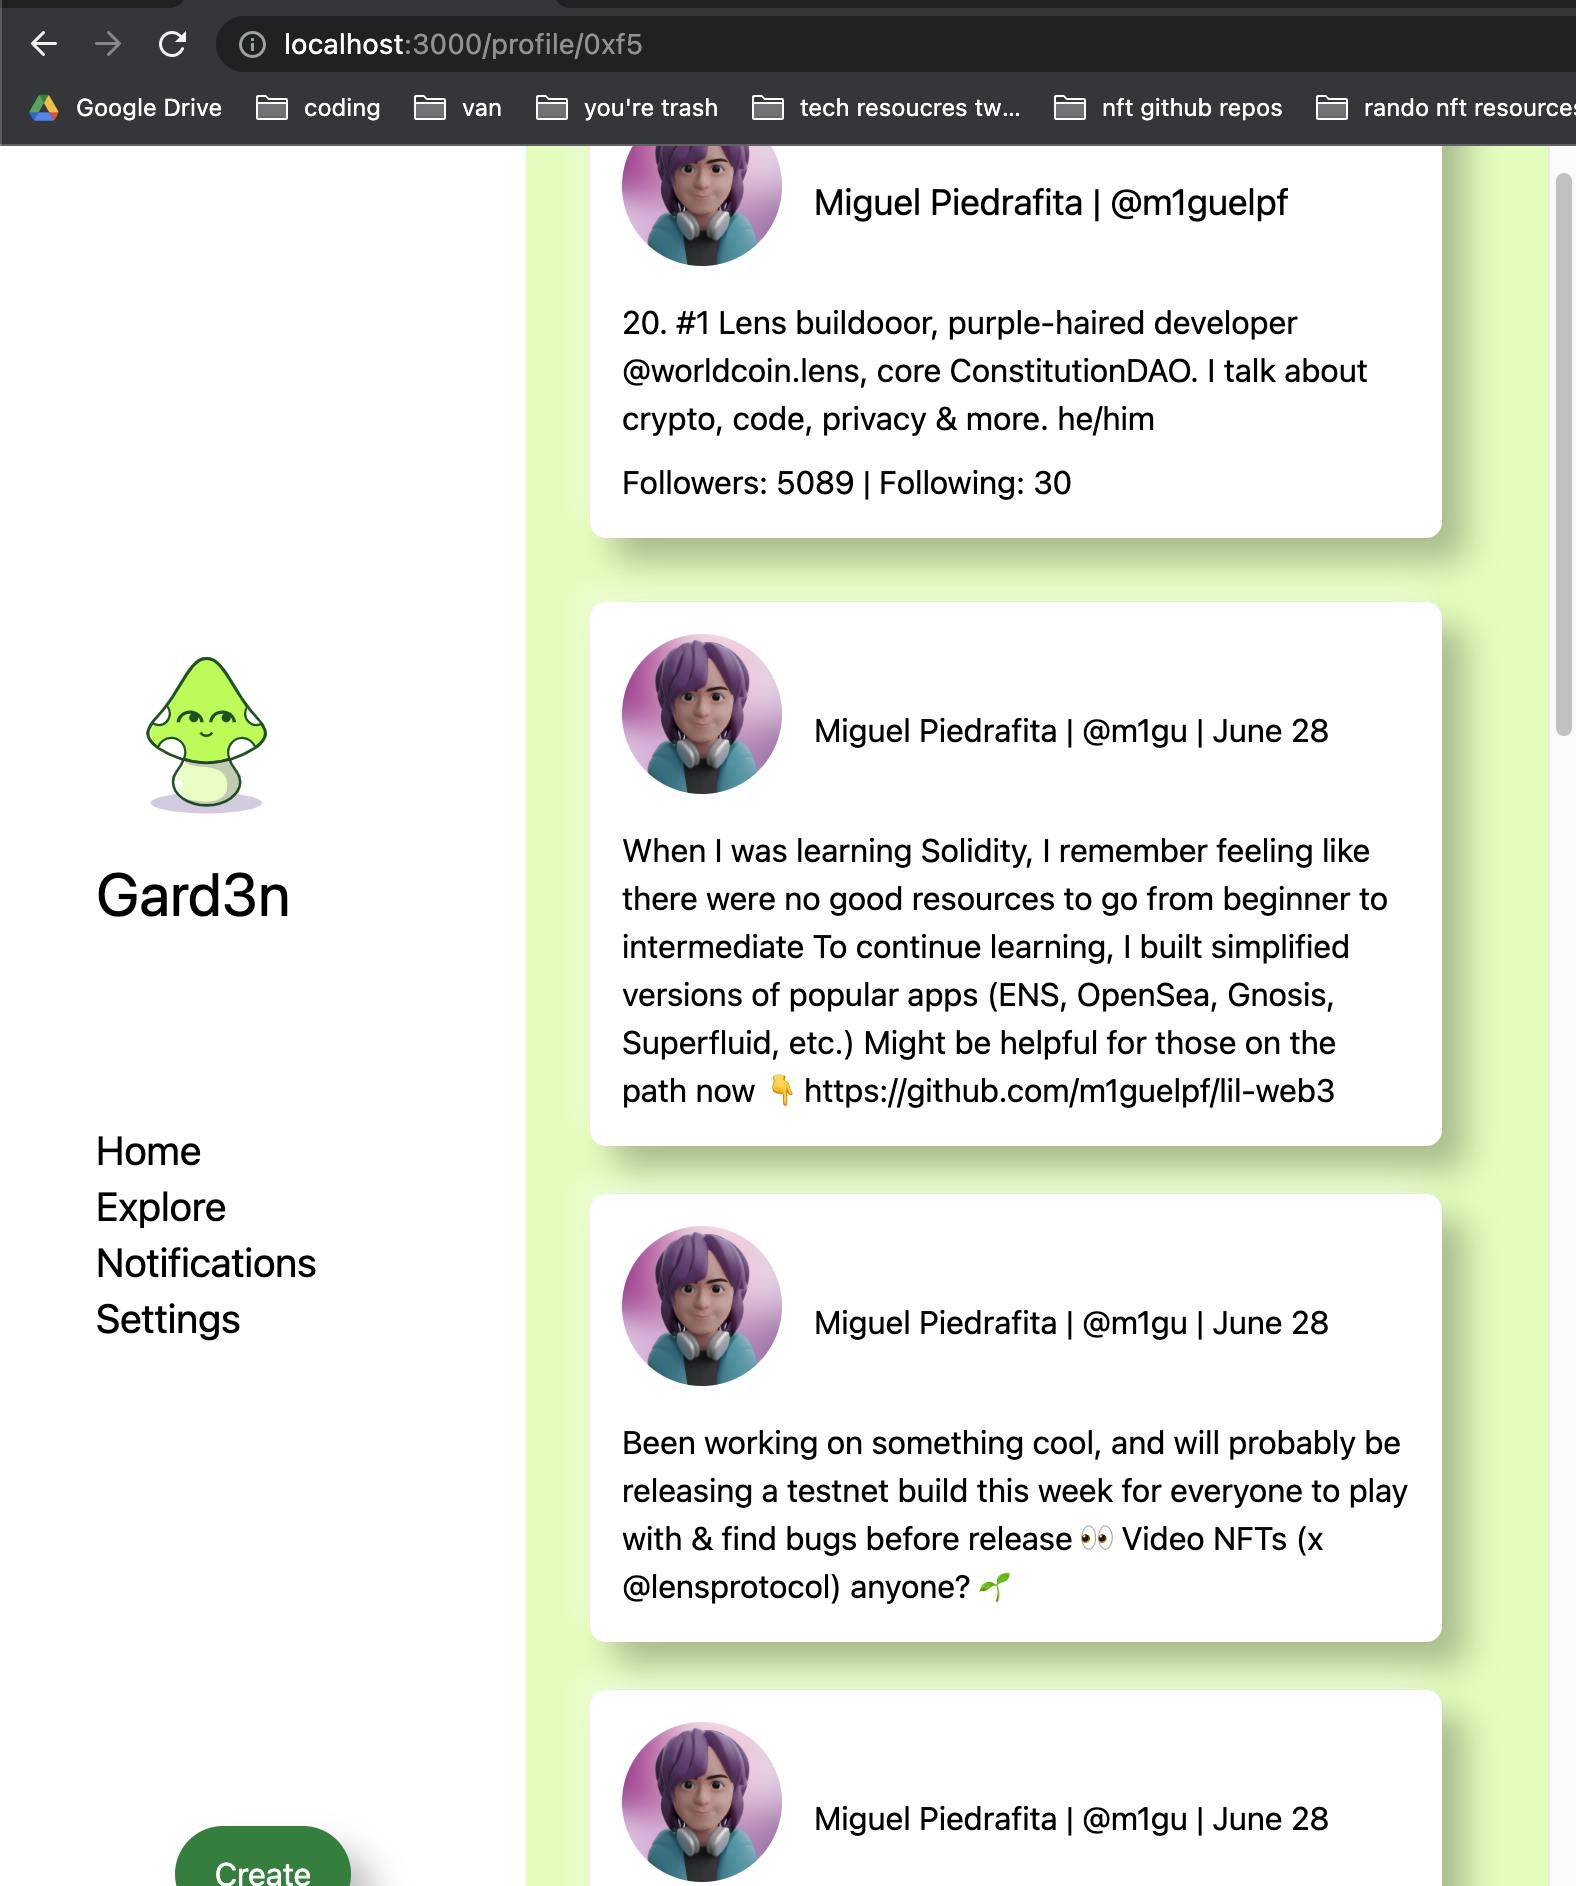
We are almost done. Next we are going to add the date. I didn't want to add any more libraries so we are using vanilla javascript.
Create a new function and call it getDate
  async function getDate() {
    const publicationResponse = await client.query(getPublications, { id }).toPromise();
    if (publicationResponse.data.publications.items.length === 0) {
      return
    }
    const publicationData = publicationResponse.data.publications.items
    setPublications(publicationData)
// this is where we pull the UTC time, and then convert it to something readable
// setting it as a string:  `MONTH DATE`
    const UTCTime = publicationResponse?.data.publications.items[0].createdAt
    const convertedDate = new Date(UTCTime)
    const fullDate = `${MONTHS[convertedDate.getMonth()]} ${convertedDate.getUTCDate()}`
    setDate(fullDate)
  }
Also add two more const variables:
const [date, setDate] = useState()
  const MONTHS = ['January', 'February', 'March', 'April', 'May', 'June',
    'July', 'August', 'September', 'October', 'November', 'December'
  ]
Next, add getDate to useEffect:
  useEffect(() => {
    if (id) {
      fetchProfile()
      getDate()
    }
  }, [id])
Update span with profile name and sliced handle like this:
<span>{profile.name} | @{profile.handle.slice(0, 4)} | {date}</span>
Results
One final step. Let's add a button to go back to /profiles from the selected profile page.
Import the button style
import { ProfileDetailStyle, ImageStyle, ProfilePublicationStyle, ButtonStyle } from '../../components/[id].styles'
Add the button after the following span
          <div className='flex items-center place-content-between mt-2'>
            <span>Followers: {profile.stats.totalFollowers} | Following: {profile.stats.totalFollowing}</span>
<!-- styled button using router to get you pack to the profiles page -->
            <button onClick={()=> router.push('/profiles')} className={ButtonStyle}>Back</button>
          </div>
        </div>
We are done 🙌🏽
Side Note
This example was done by using the Polgygon Mainnet API (https://api.lens.dev). If you decide to use the Mumbai Testnet API (https://api-mumbai.lens.dev), you will not have access to the same content as on mainnet. This is intentional since the since each API has a different contract.
Resources: API Links
